> ## Documentation Index
> Fetch the complete documentation index at: https://supermemory-soham-v5-docs-attach-to-include.mintlify.site/llms.txt
> Use this file to discover all available pages before exploring further.
# Claude Desktop
> Connect Supermemory MCP in Claude via Settings → Connectors
This guide adds Supermemory to Claude, on desktop or the web, as a custom connector. For other clients, see [setup and usage](/supermemory-mcp/setup).
## Step 1: Open connectors and add a custom connector
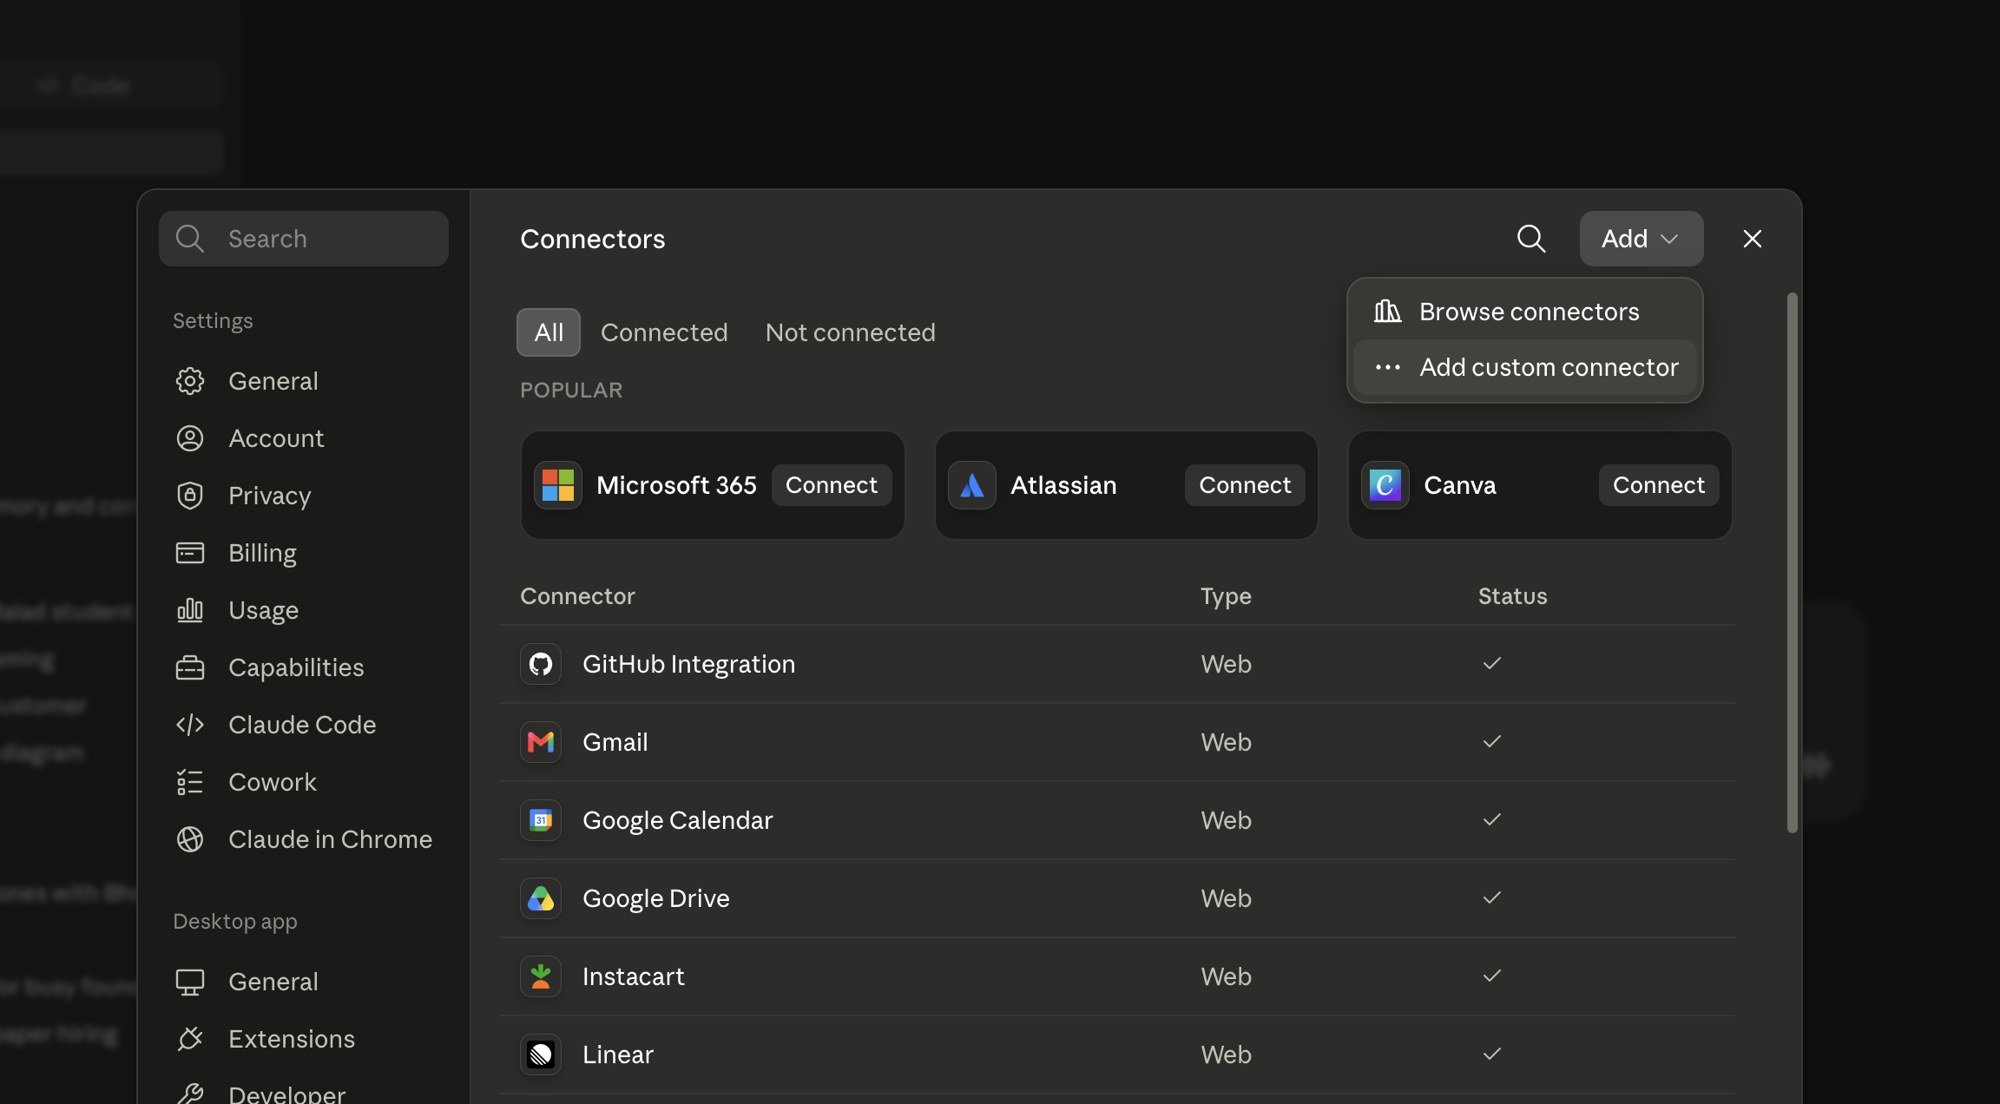
In Claude, open **Settings → Connectors**. Click **Add**, then choose **Add custom connector**.
 ## Step 2: Enter name and remote MCP URL
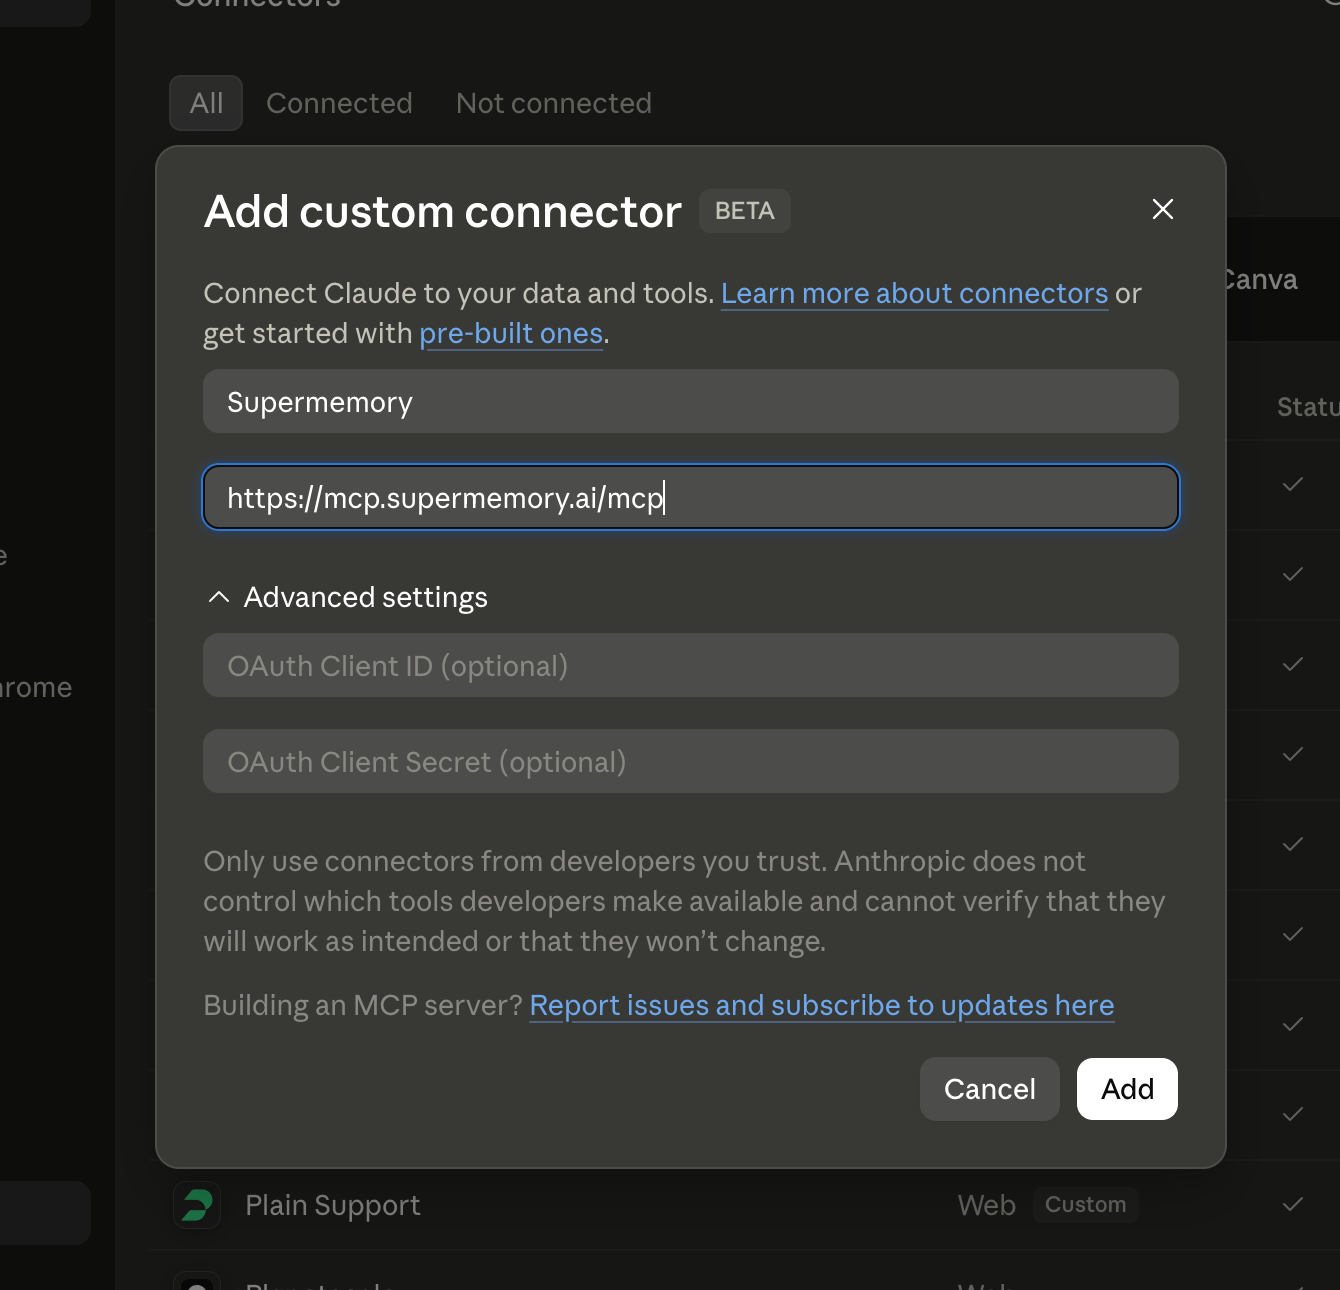
In the **Add custom connector** dialog:
| Field | Value |
| - | - |
| **Name** | `Supermemory` (or any label you prefer) |
| **Remote MCP server URL** | `https://mcp.supermemory.ai/mcp` |
Leave **OAuth Client ID** and **OAuth Client Secret** empty unless you have custom OAuth credentials. Click **Add**.
## Step 2: Enter name and remote MCP URL
In the **Add custom connector** dialog:
| Field | Value |
| - | - |
| **Name** | `Supermemory` (or any label you prefer) |
| **Remote MCP server URL** | `https://mcp.supermemory.ai/mcp` |
Leave **OAuth Client ID** and **OAuth Client Secret** empty unless you have custom OAuth credentials. Click **Add**.
 ## Step 3: Connect
Supermemory appears under your connectors. Click **Connect**.
## Step 3: Connect
Supermemory appears under your connectors. Click **Connect**.
 ## Step 4: Authorize
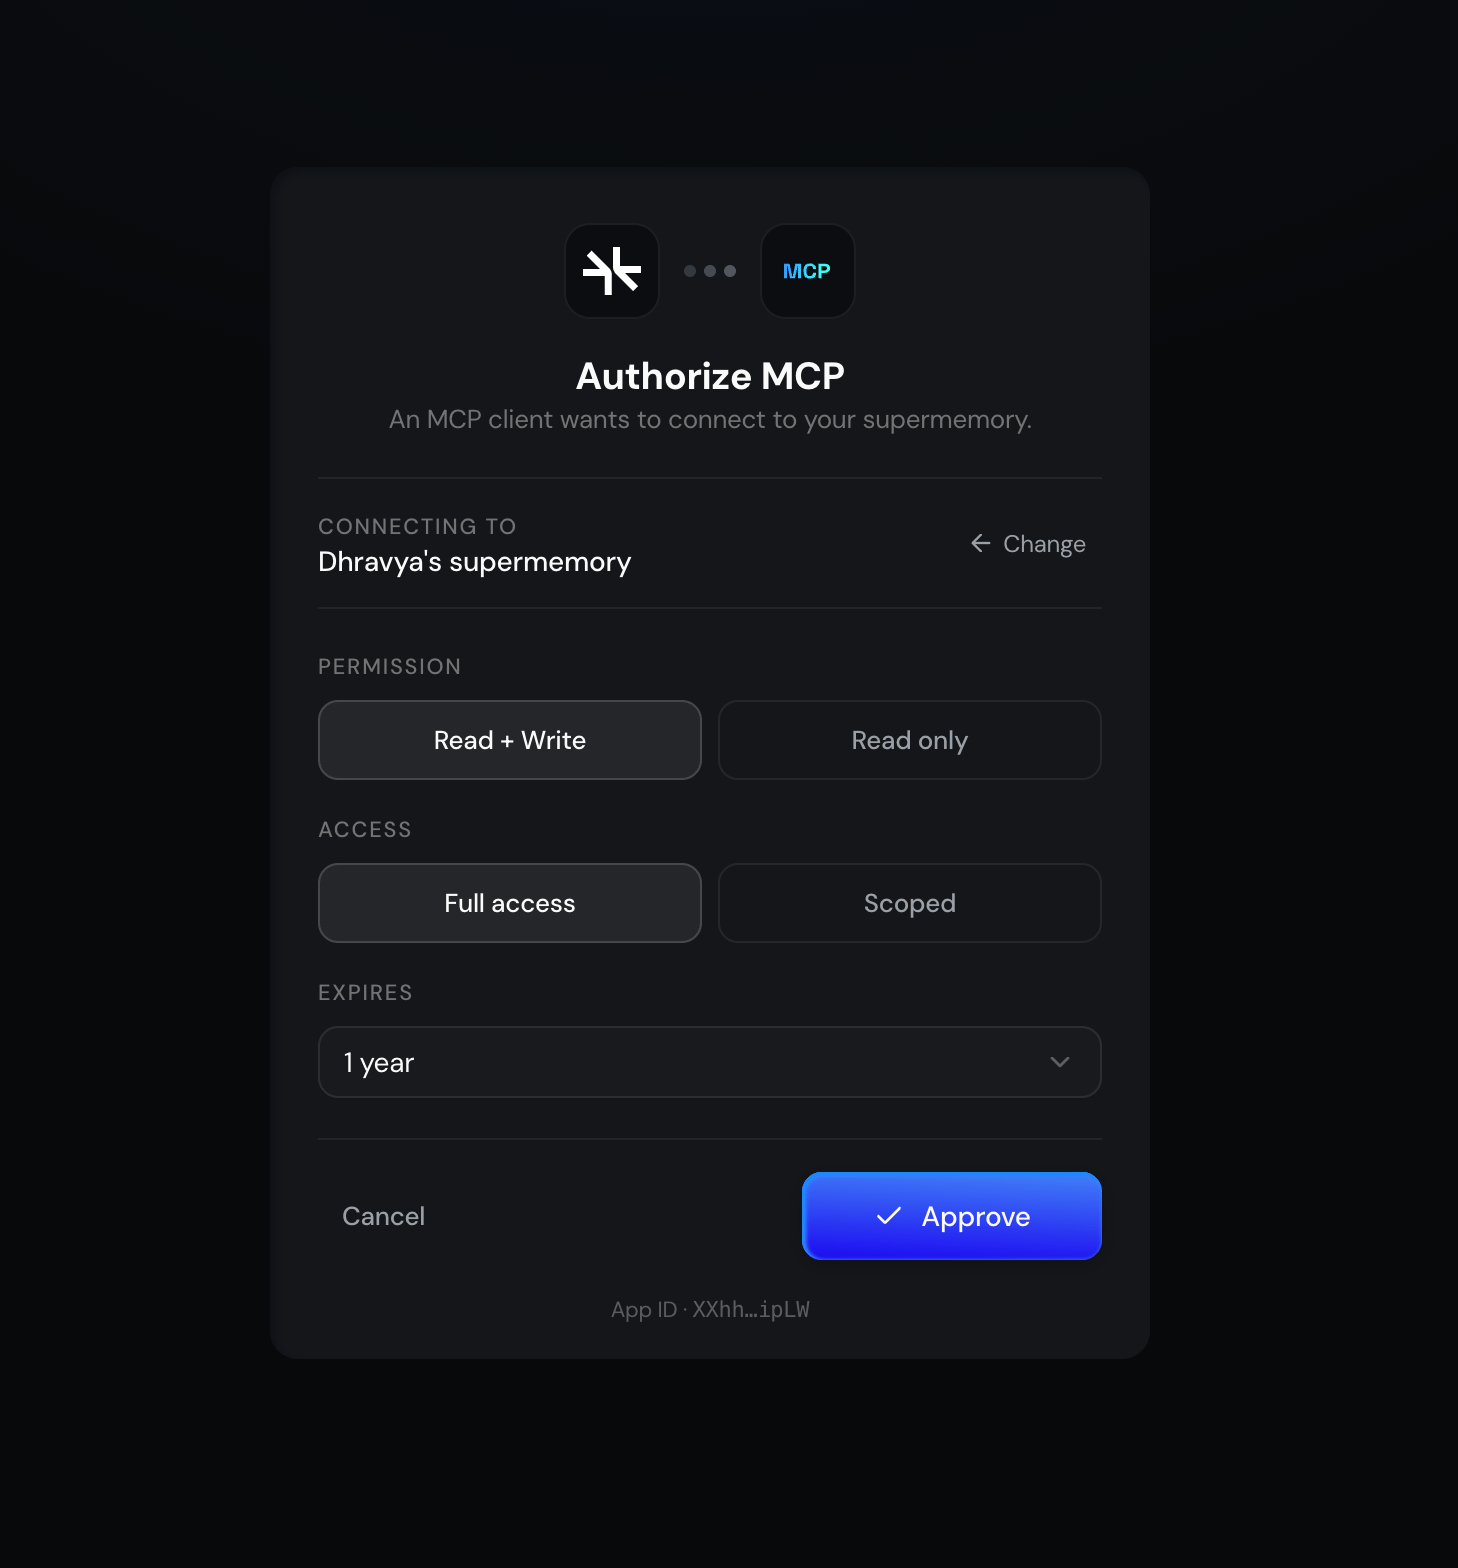
You’ll be redirected to Supermemory to sign in and choose access scopes (for example **Read + Write** or **Full access**). Select the scopes you want, then click **Authorize**.
## Step 4: Authorize
You’ll be redirected to Supermemory to sign in and choose access scopes (for example **Read + Write** or **Full access**). Select the scopes you want, then click **Authorize**.
 ## Done
Supermemory is connected and ready to use in Claude. You can change or revoke access later from **Settings → Connectors**.
***
**See also:** [Overview](/supermemory-mcp/mcp) · [Setup and Usage](/supermemory-mcp/setup)
This documentation is built and hosted on [Mintlify](https://mintlify.com), a developer documentation platform.
## Done
Supermemory is connected and ready to use in Claude. You can change or revoke access later from **Settings → Connectors**.
***
**See also:** [Overview](/supermemory-mcp/mcp) · [Setup and Usage](/supermemory-mcp/setup)
This documentation is built and hosted on [Mintlify](https://mintlify.com), a developer documentation platform.